Colorful Image Colorization for GIMP
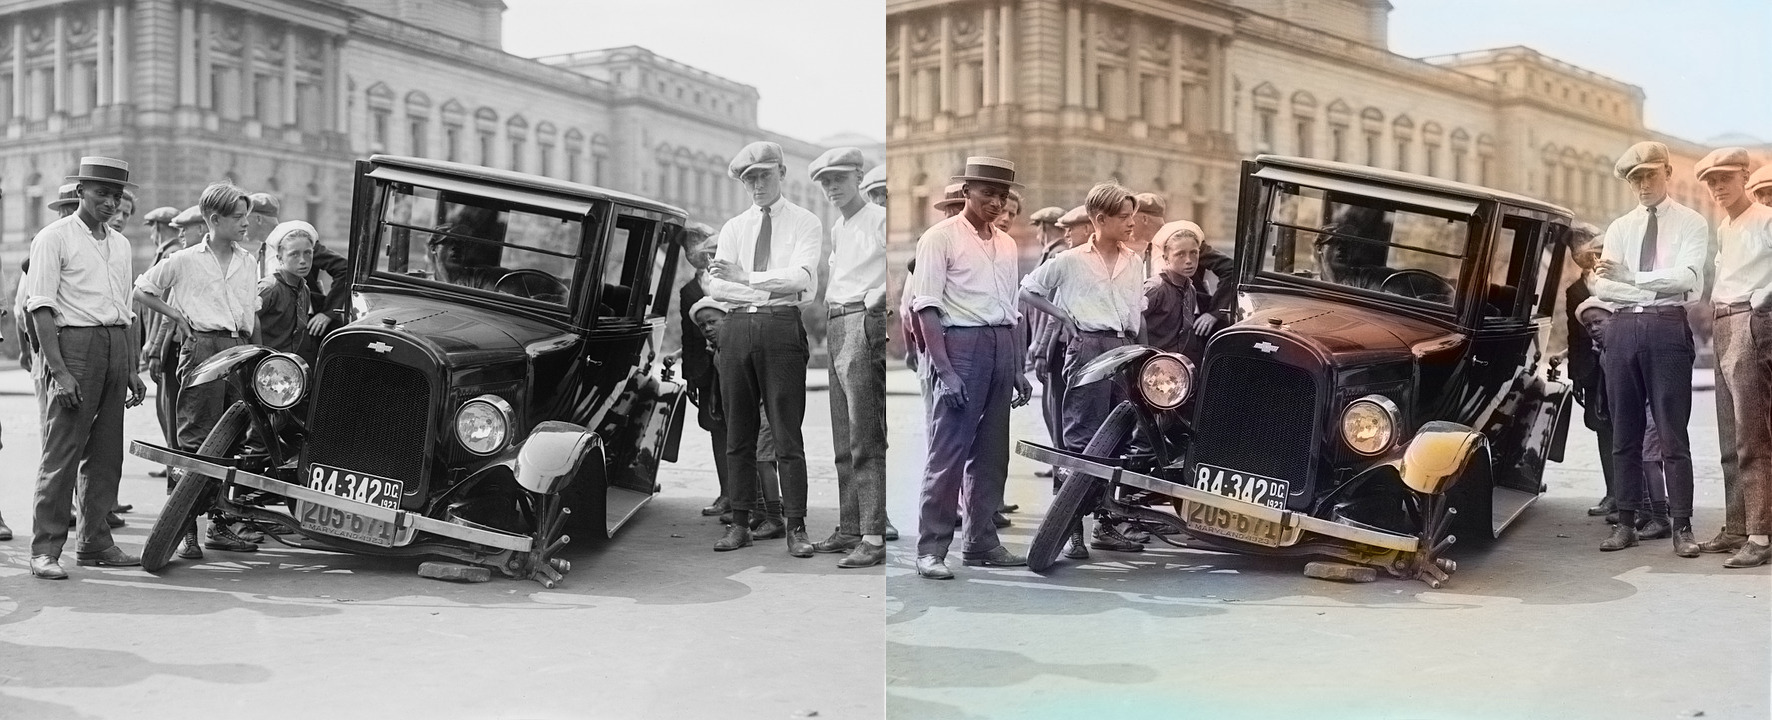
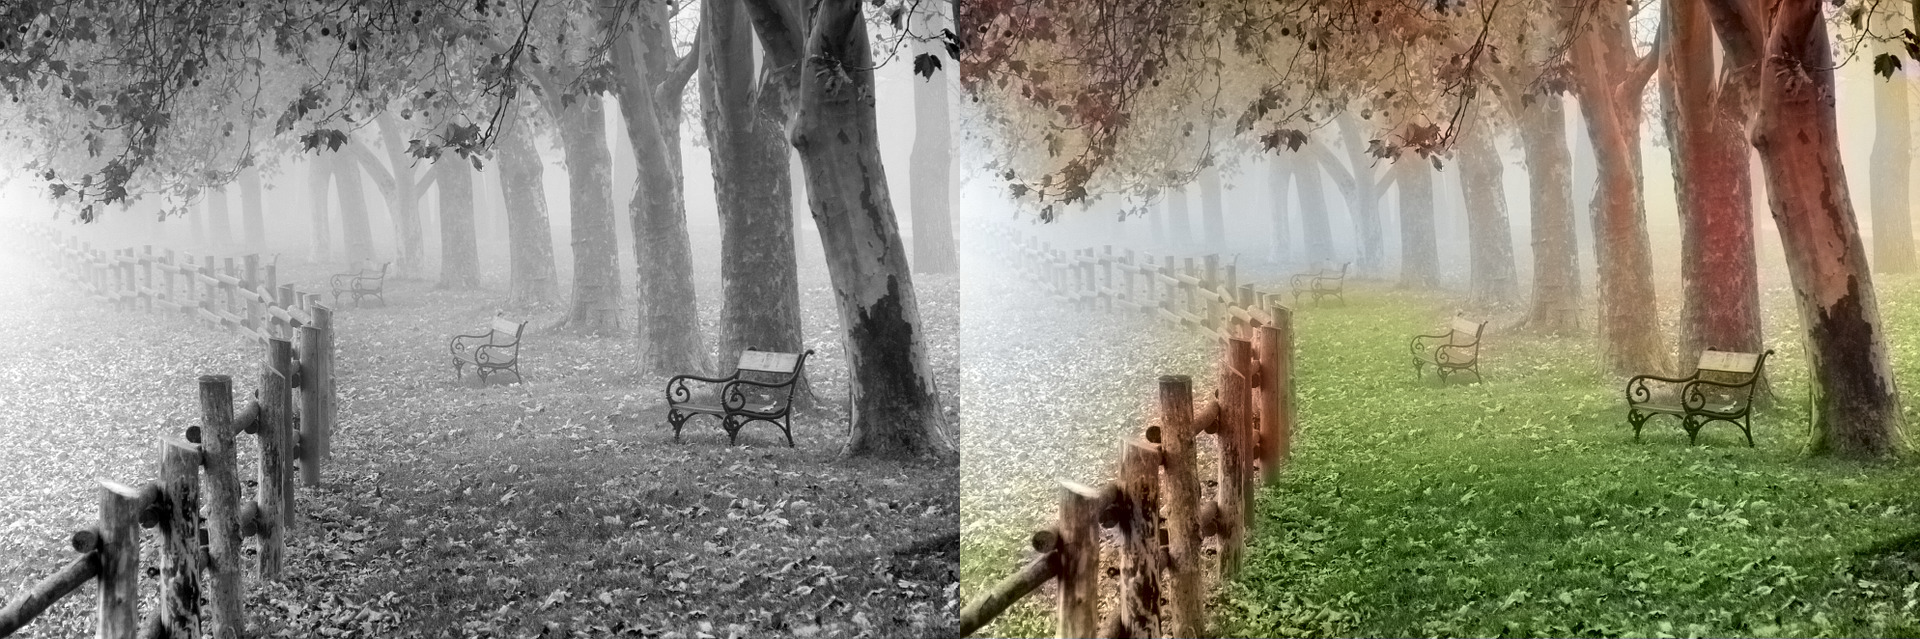
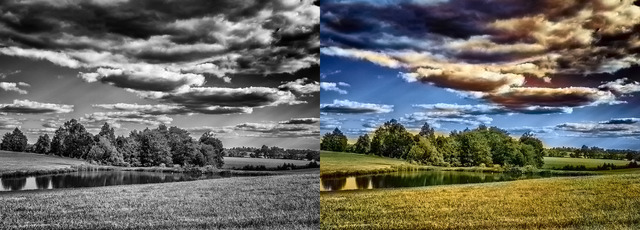
I have always been fascinated by the idea of automatic conversion of black and white photography to color. With thanks to the neural network hosted on Algorithmia, it is now possible.
You can use the link above to try an online demo. Or register to Algorithmia and use this CLI utility that I have programmed in Python and a GIMP plugin:
- Get source code: https://github.com/BruXy/colorize
- Download: colorize-1.0-2.tar.bz2
- Check README for more information: https://github.com/BruXy/colorize/blob/master/README.md
Some examples of Colorful Image Colorization output:
More info
- Richard Zhang, Phillip Isola, Alexei A. Efros: Colorful Image Colorization
- Automatic Colorization
- Demo code for Colorful Image Colorization.
Conversion of images to black and white is a science
The digital representation of an image itself is a whole science. There are several models like RGB, CMYK, YUV, CIE XYZ,... for representation of a color image. The human eye is capable of seeing an electromagnetic spectre in the range of wavelengths from λmin = 360 nm to λmax = 830 nm. Light stimulates receptors on the retina and those signals to the brain trigger human sight. The human eye has two types of receptors: rod and cone cells. Rods are extremely sensitive to light intensity and cones work for color perception.
The human eye has a lower number of cones than rods, so its sensitivity for colors is lower than that for intensity. Also our sight has different sensitivity levels for red, green and blue channels. It is usually: 29.9 % for R, 58.7 % for G and 11.4 % for G (but the exact numbers differ because there have been several research studies done). Conclusively, we are most sensitive to the green channel.
Those principles are used often in the image processing field. For example the JPEG format, stores more intensity information than color information.
Comparison of different gray scale methods and its colorization
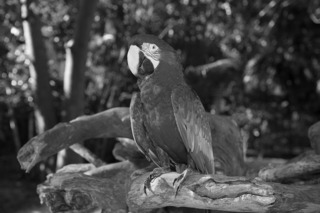
I was wondering how Colorful Image Colorization project would handle the same image where different methods of gray scale conversion were used (where it could simulate different image sensors). I sort of expected that a neural network would be able to identify objects, and that using its knowledge base, it would assign the known color to an object, but eventually this did not happen.
I have used several methods provided by Image Magick, with this script:
#!/bin/bash
# Grayscale conversion methods:
# http://www.imagemagick.org/script/command-line-options.php#intensity
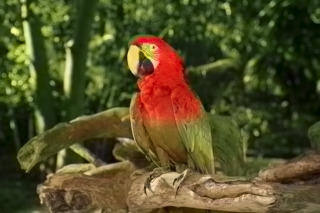
ORIGINAL=parrot-original.jpg
OUTPUT=parrot # -method.png
SIZE=100% #320x240
METHODS=( Rec601Luma Rec601Luminance Rec709Luma Rec709Luminance
Brightness Lightness Average MS RMS )
# Separate RGB channels
for ch in R G B; do
convert -verbose \
-set colorspace RGB \
-resize $SIZE \
-depth 8 \
$ORIGINAL \
-channel ${ch} \
-separate -depth 8 PNG:${OUTPUT}-${ch}.png
done
# Convert to grayscale
for method in ${METHODS[*]}
do
convert -verbose -grayscale $method \
-resize $SIZE \
-depth 8 \
$ORIGINAL PNG:${OUTPUT}-${method}.png
done
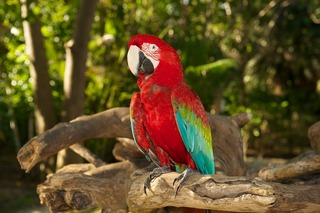
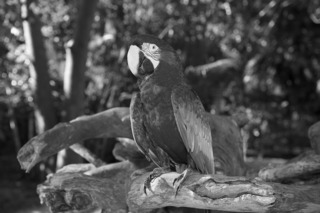
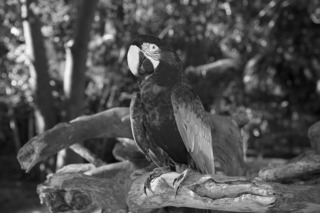
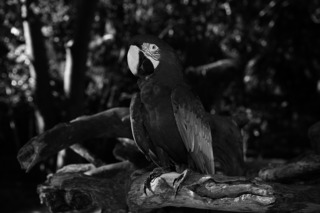
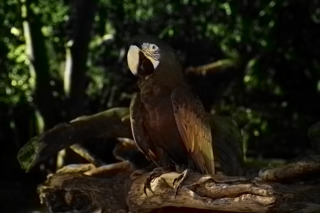
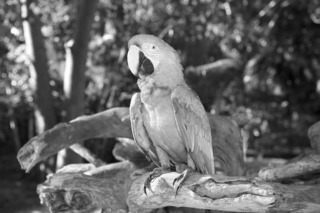
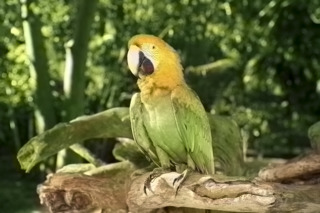
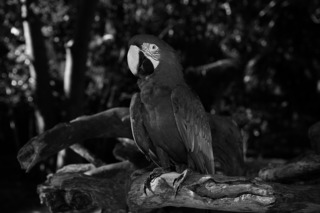
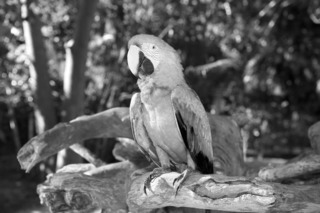
- Original image:
- Rec601Luma: 0.298839R' + 0.586811G'+ 0.114350B'
- Rec601Luminance: 0.298839R + 0.586811G + 0.114350B
- Rec709Luma: 0.212656R' + 0.715158G' + 0.072186B'

- Rec709Luminance: 0.212656R + 0.715158G + 0.072186B
- Brightness: max(R', G', B')
- Lightness: (min(R', G', B') + max(R', G', B')) / 2.0

- Average (R + G + B) / 3.0
- MS (R^2 + G^2 + B^2) / 3.0
- RMS sqrt( (R^2 + G^2 + B^2) / 3.0 )
- Red channel:
- Green channel:
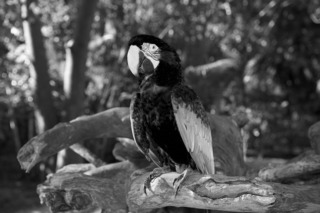
- Blue channel:
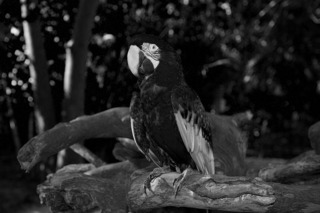
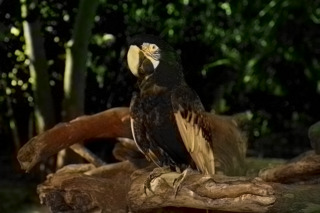
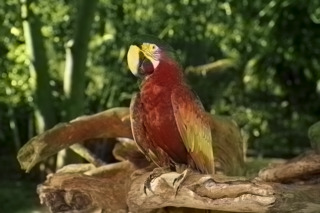
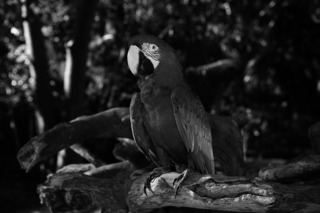
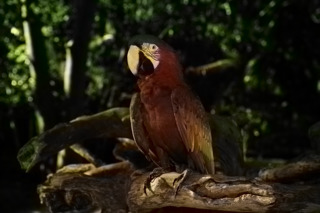
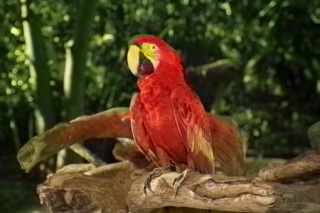
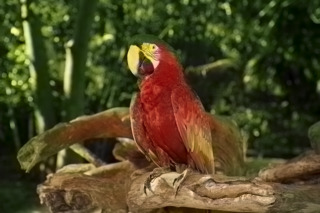
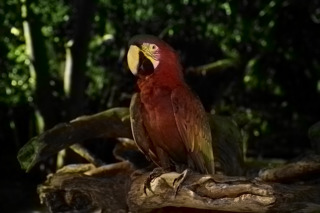
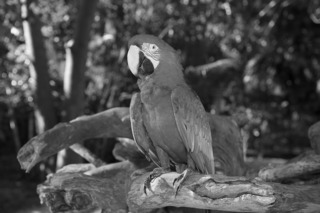
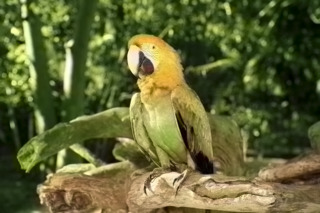
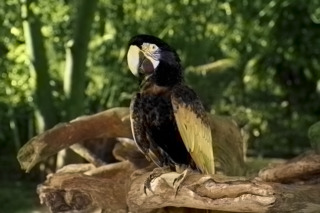
Colorization of Colorful Image Colorization does not reconstruct colors! But provides a plausible color version. As you can see in the examples above, in my opinion the best results are when gray scale input was made by Lightness, Average and Rec601Luma. In all cases, the network assigned plausible colours to the vegetation and tree branches ve, but the parrot's colours were quite inconsistent.
Sometimes an input image contains similar gray levels for obviously different colors. For example the head of the parrot in Rec601Luma has a similar gray shade as the background, so the edge between the background and head is not clearly visible and the output will assign the same color to the area. Modifying an input image using histogram equalization with level or curve editing tools can help to emphasize edges in the input image.
How to work with colorized images in GIMP
There are several methods people use to manually convert BW image into colorized. My preferable methods are:
- Convert gray scale image to RGB: Image → Mode → RGB.
- Add new layer: Layer → New layer, Layer Fill Type: Transparency
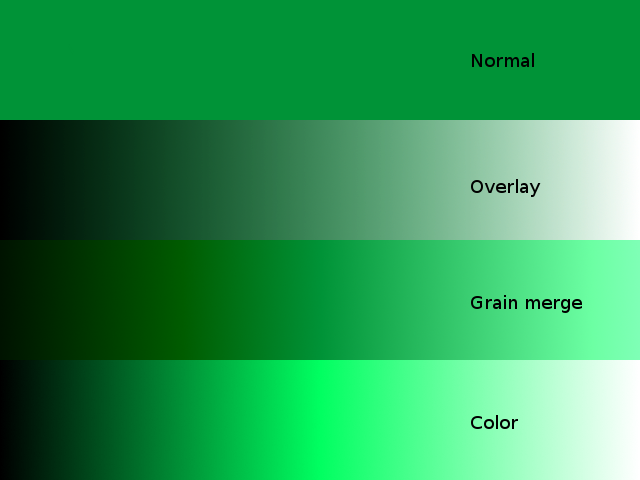
- In Layer window, chose blending Mode. There are three different variants: Overlay, Grain merge and Color. See example below.
- Now use brush, select color and in overlay layer draw over the area which should interact with this color.
- Use path to select area, create new layer and fill it with desired color.
- Use path to select area in original layer, copy&paste selection to new layer and use Colors → Colorize → Hue to select color of object.
With the manual method the only constraint is time. You can spend hours creating the perfect result. Or let Colorful Image Colorization do the work for you.
Separate intensity and colors
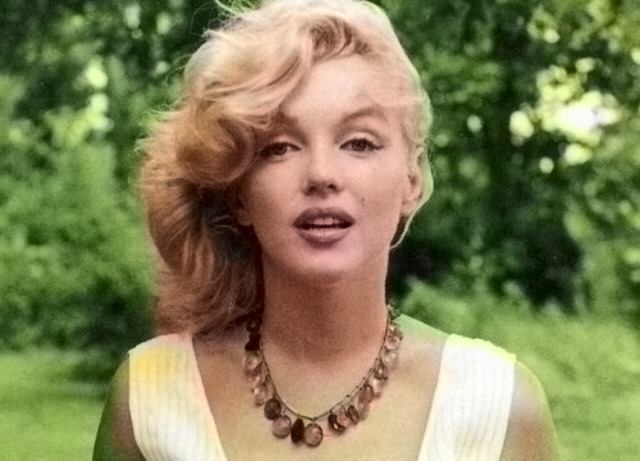
Let's colourize some monochromatic photography:
Use Filter → Artistic → Colorize to create a color image (the GIMP plugin must be installed and you must have your API key). Here is the result, save it as a new image: File → Export as.
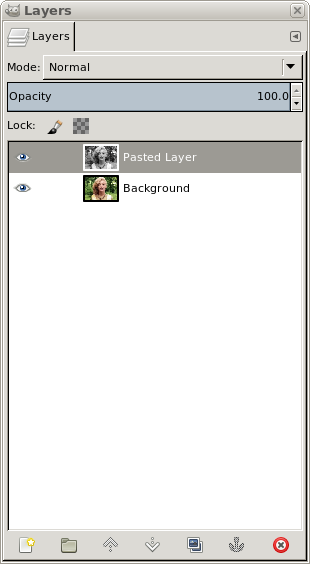
Copy grayscale image: Select → All, Edit → Copy. And paste is as a new layer to colorized image. You will get two layers, color at the background and gray scale in the foreground:
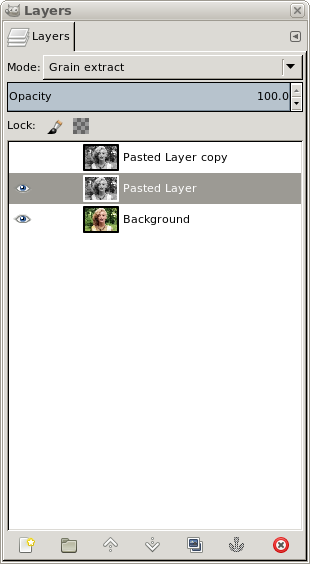
In the Layer window, right-click on the pasted layer and select Duplicate. Make the new Pasted Layer Copy invisible by clicking on the Eye icon. Select the middle layer and choose Grain extract mode.
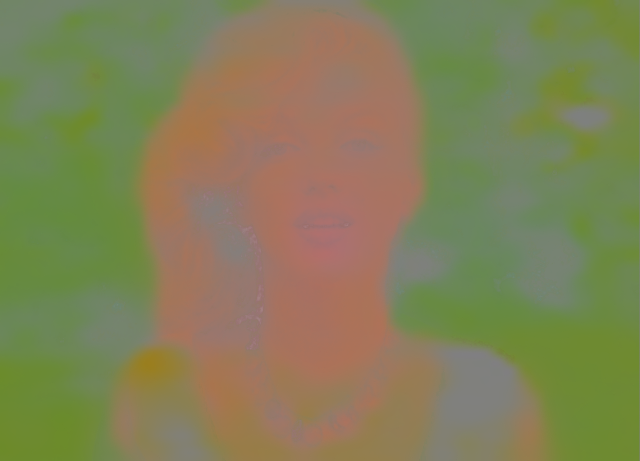
Create a new layer with only color information: Layer → New from visible. The result containing only colors is stored in a new layer named Visible by default. The result is here:
You can combine this layer with grayscale with Grain merge mode. The gray scale image will be the background (mode Normal) and the color image, the foreground (mode Grain Merge). Now you can edit only this layer to improve or change some part of image. Sometimes you will need to switch to Normal mode to see color information better and also use the Color Picker quite a bit for choosing right color.
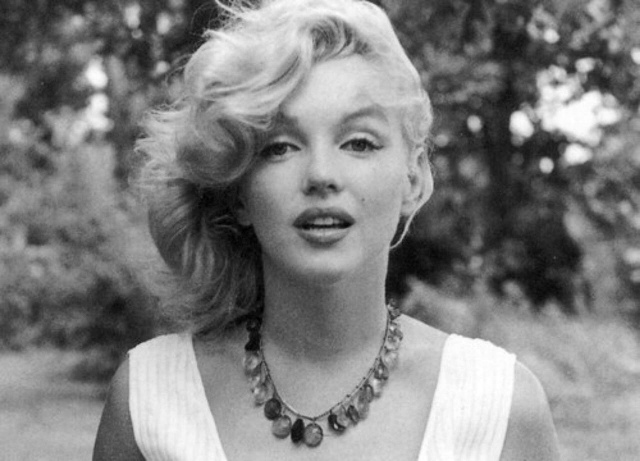
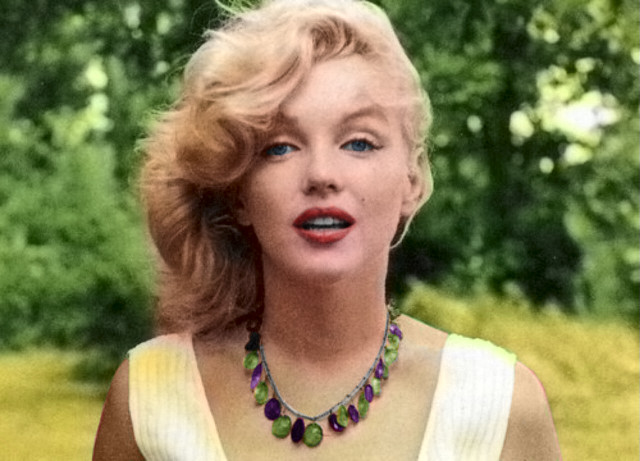
Another useful tool for Grain Merge editing is the Smudge tool. You can move neighborhood color areas in a direction, where automatic colorization has not gone well. The arm edges were little bit green, so I put more skin tone color in those areas. You can also select a part, switch to mask editing mode to make it a little bit fuzzy and change its hue or saturation.
I have deleted some parts of the color layer to create completely new color information in a new layer with blending mode Overlay. I deleted colors from necklace, lips and eyes and created them myself in the new Overlay layer. This is the final result:
I believe that using this Colorful Image Colorization tool will add a new dimension for your graphic work.